
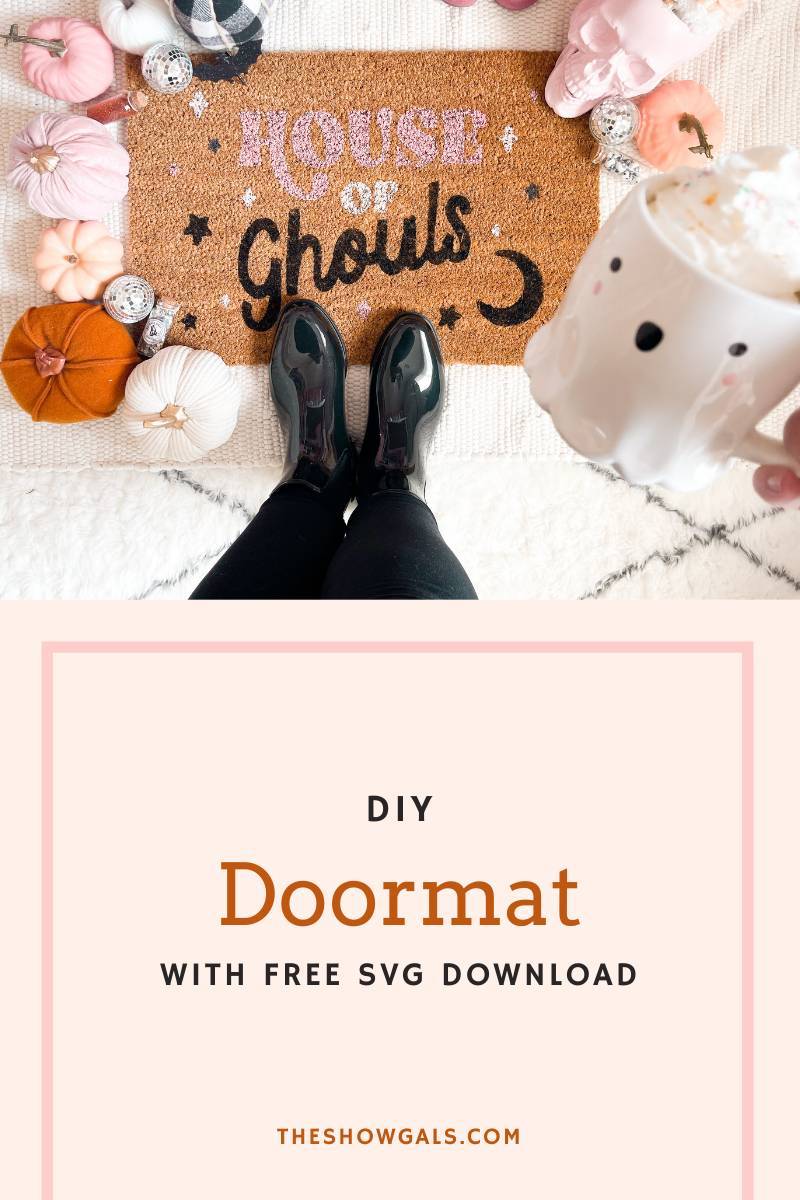
There are so many ways to get your home ready for every season! My favorite way to start is to create a new doormat! There are so many really cute doormats on the market that you can simply just buy but that just takes all the fun out of it! I love thinking of a cheeky phrase and making a cute design that perfectly represents the season our family is in figuratively and literally!
Here is my disclaimer before you start creating a doormat, especially if it is your first one!
The first doormat I made was so painful I swore up and down I would NEVER make one again! But here I am, on my 7th one in a year. I don’t want to discourage you from making one I just want you to go into this knowing it is something that gets much easier the more you create them! I am here to tell you what works best for me and to learn from my mistakes! But you can do it! I believe in you!
This Strategy Requires a Cutting Machine
There are many different ways you can create a doormat but this blog post is to tell you how using a Cricut or any other cutting machine using vinyl. This is what works best for me and if you do not have a dye cut machine, you can use stencils that you can find at your local hobby store! On my first attempt to make a doormat I REFUSED to use this method because I didn’t want to waste vinyl, because let’s face it… Vinyl is expensive! But that was a huge mistake and let me save you some time by telling you, it’s worth it!
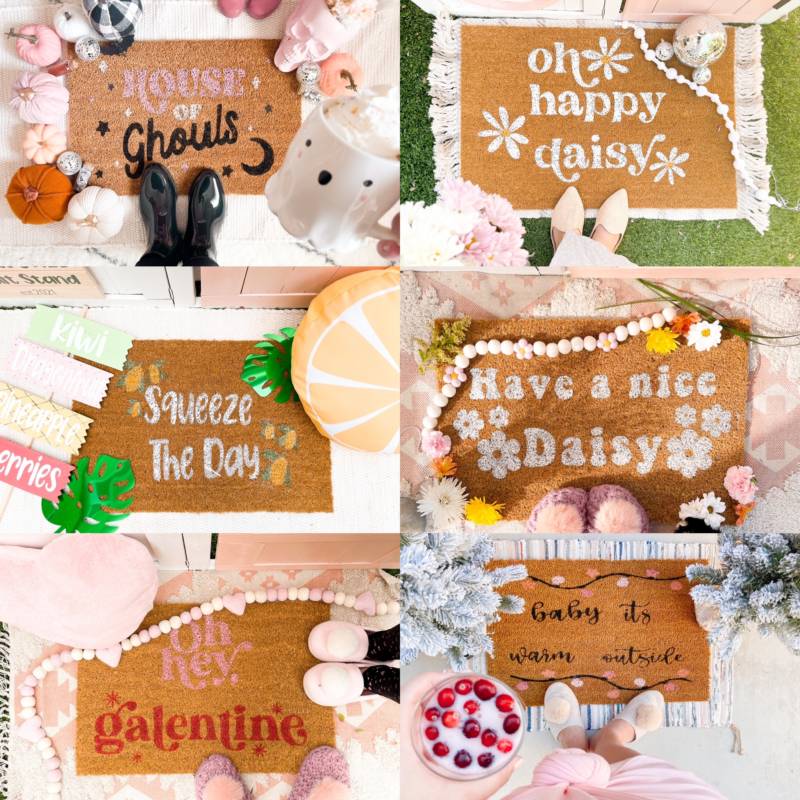
Here are all the doormats I have made this year! I think I’ve come a long way from my first (bottom right)!
What you will need:
- Cricut (link)
- Blank Doormat (link)
- Vinyl (removable or permanent)
- Transfer tape
- Blow dryer
- Paint (I have experimented with many types of paint and what I find works best is outdoor paint you can buy a sample size of at your local hardware store! It is also cheaper that way too!)
- Bristle paint brush(s)
How to:
- Create your design. You can create your design from scratch or purchase a svg from etsy! My favorite designer to purchase svgs for doormats from is Tate made Modern! (you can find her shop here) She even created a custom design for me to share with you this season! You can download it for FREE at the end of this Blog post! If you are designing your own, my favorite website to find the perfect font is dafont.com
- Whether you want to have different colors on your mat or not, to make the stencil it all needs to cut together so you will need to make the design in design space all one color and you will make it whatever colors you want when painting.
- Once you have created your design make sure you measure your mat and size your design accordingly. I usually have to split my design in two pieces and weld together!
- Cut design on Vinyl. Permanent or Removable works. I just use whatever I have on hand or whatever color is on sale since it won’t matter in the end.
- Reverse weed the design, make sure you only weed out what you want to show on the mat creating your stencil! This is where it is really easy to make a mistake so make sure to think about it before you start weeding. Take it from me! Haha
- After weeding your design apply transfer tape
- Transfer your design to your mat. This part requires a ton of patience and is usually when I am questioning all my life decisions. But push through! You can do it!
- After the vinyl is on the mat, blow dry the vinyl so that is adheres to the mat. Make sure to dry it on high heat but low volume so that the vinyl doesn’t blow off the mat.
- Once the stencil is adhered to the mat you can start painting! There is a few things to note here when painting your mat for the beset result.
- If you are using any color other than black or white, it is smart to go in first with white and then go over the white with your other colors. If you go right in with a color (like pink) it won’t show very well so white gives it the base it needs to show.
- When applying the paint You gotta get in the nooks and crannies so use a pushing motion with the paint brush to really get It in there.
10) Let paint completely dry and remove the stencil. The most satisfying part!
11) Make touch ups as needed.
I mentioned above that I collaborated with Tate Made Modern to create this season’s doormat SVG and she was so generous to let me offer it to all of you for free! You can download that here!
Xo,
Katelyn

